totalnavy.com
Online Resource for all things Navy
132 Prospect Ave  - Woodmere, NY 11598

Phone: 718-471-5464    Email click here   Fax 718-337-7115
Main Website Ship Catalogue Paints & Displays How to Build a Ship! Navy Ball Caps
How to Books Decals Photo- Etching Ship Art Prints Main Website

Our Customer Service is open weekdays from 9:00 am to 8:30 pm EST time call us if you need help. 718-471-5464

      Toll free 800 - 845-1140

Shipping will be added to all orders, we always endeavor to give you the best rate >>> Click for Rates.

If you have any questions or need help email us, call us or click here for HELP


HOW DO I BUILD A  SHIP MODEL

All you need is a kit that you want to build a little time, planning, patience

and a desire to have some relaxing fun with your hands and your mind.

1) Time - whether it's a few minutes a day or a couple hours a week set aside time and a place where you will be comfortable to build . I've even used to trim parts on the train ride to work.

2) Planning- usually I will get pictures of the actual ship so I have a feel of the ship that I want to build. I will go to the library and check out books too. Or you can help me feed my children and buy a book from us that is filled with pictures of these ships. 

3) Patience- not what doctors have, but the ability not to have to build it overnight.

4) Fun - if you are feeling antzy don't push yourself, put it down and come back to it later.

What's entailed?

The Kit

The Book

The Tools

The Glue

The Paint

      This is what comes out!

Honor Guard Flag Carriers

Or if you want to go the next step and add Photoetching!

Sam Browne Belts

Turn the same kit into this!

Honor Guard Flag Carriers

Built by Harry O'Hanian

Now O'Captain My Captain! What teaches me to do all that?

Want to see how to do it! Click here!
Click link above for a comprehensive guide to building a waterline ship.
         

Essential Skills Scale Modeling


Were you a teenager the last time
you built a model?


A step-by-step introduction to scale modeling basics.
Beginning scale modelers are full of questions:
What kinds of models are there? What kinds of tools
do I need? What glue works best?
How do I put a model together?
How are the decals applied?
Finally, Kalmbach offers answers to
all these beginner questions and more.

This new book is filled with more pictures
and how to articles than their other book.


List $21.95  Our Price BK01 19.95


                             Free Modeling Videos    


Gluing the Model - http://www.youtube.com/watch?v=wvL0AC37NOw

Getting Started - http://www.youtube.com/watch?v=vQ0xnyQvntI&feature=related

Tools - http://www.youtube.com/watch?v=SQXT5xjosDQ&feature=related

Building a model Part 1 - http://www.youtube.com/watch?v=DlNWxwtqjdc

Building a model Part 2 - http://www.youtube.com/watch?v=gTpQ_flL0vo&feature=related

Building a model Part 3 - http://www.youtube.com/watch?v=CripDNrGxvY&feature=related

Making a Ship Flag - http://www.youtube.com/watch?v=s0kRNK3zTEA&feature=related

How to make Stretch Sprue - http://www.youtube.com/watch?v=cpCzL2GJ0b4

Building PT 109 Part 1. Classic Revell Kit - http://www.youtube.com/watch?v=7Qdil-x6aDY

Building PT 109 Part 2. Classic Revell Kit - http://www.youtube.com/watch?v=n2vy-U6GUJ8&feature=related


How to build a plastic Model!


Copyright 2011 The Testor Corporation, All Rights Reserved

Your First Model

Using Paint Pens Instead of Bottled Paint

If you don’t want to bother with bottled paints and brushes, an alternative is to use paint pens. A paint pen, is like an ink marker: the paint and brush are one piece. You apply the paint as you do when drawing on a piece of paper with a marker. Paint pens come in most popular colors, including red, dark blue, light blue, green, gold, silver, and white.

Before you use the pen, shake it vigorously for two or three minutes. A mixing ball in the barrel of the pen helps to stir up the paint. The first time you use the pen the tip will be dry. Wet the tip with paint by pressing the tip gently against a piece of scrap paper. Keep Pressing the tip against the paper until the paint oozes from the tip. You will also need to repeat this from time to time while painting your model.

Apply the paint to the model in even, straight strokes, just like with a brush. The tip of the pen is made of a special fibrous material that can be cut with a knife to just about any shape desired. However, you’ll probably want to keep the tip as it is until you gain more experience in using the pens.

When you are finished painting, simply return the cap to the pen. You don’t need to clean anything. Be sure to recap the marker when you are finished, or the tip will dry out. If that happens, the pen may be ruined. If the tip has dried out, you can try to repair it by soaking it in paint thinner. Note that Testor paint thinner is recommended for Testor paint pens.

Displaying Your Model

Models are meant to be displayed, not tossed into the bedroom closet. A model car or truck doesn’t need a display stand, but if you’d like, you can place the finished model on a piece of wood. The section on displaying your models goes into more detail on building stands and displaying your models.

About the only thing to remember when displaying your model is to keep it away from heat and direct sunlight. Excessive heat will melt the plastic, of course, but even prolonged exposure to the heat of air vent or the rays of the sun can cause the plastic of the model to become brittle.

Now that you’ve finished your first model, how about another? In a later section, you’ll learn the technique of assembling a model using plastic cement, a better way to remove the plastic parts from the runner, the "right" way to apply decals, and more.

Preparing the Decal

Model kit decals come on one or two sheets of paper. Most decal sheets provide more decals than you can use. Some of the decals are alternates--you use some instead of others. Don’t feel that just because you have the decal, you must apply it to your model.

Before you use a decal, you must cut it out using a pair of scissors or a hobby knife (use scissors for now). Be careful that you don’t accidentally cut a decal in half. When cutting, it’s all right to get the entire decal, not just the part with the ink. Get all the clear surrounding film as well. When the decal is applied to the model, the clear film will be nearly invisible.PICTURE 1

When you have cut out all the decals you want to use, decide exactly where you want them. As a guide, you can use the decal placement illustrations on the instruction sheet, as well as the photos on the model box. But ultimately, it’s up to you where the decals will finally be placed. Before actually applying any decals, place each one at the desired spot on the model. Does the decal look good there? Will it fit? Watch for sharp corners and curves. Until you’re more experienced, it’s far easier to apply decals to flat surfaces. For the time being, you should avoid applying decals to corners and curves.

Doing one at a time, place a decal in a dish of clean water. You’ll get the best results if the water is at room temperature or slightly warmer. Do not immerse decals in water that is hot or cold.

The decal film will start to separate from the paper backing within 30 to 60 seconds after it has been dunked in the water. Take the decal out of the water and place it on a paper towel for a minute or so. This lets the excess water drain from the decal, and it lets the adhesive on the film soften. If you leave the decal in the water too long, the film may separate from the backing all by itself. This makes the decal difficult to apply to the model. Whenever possible, do not leave the decal in the water for longer than a minute. PICTURE 2

At this time, the decal film should slide off easily from the backing sheet, but don’t do that yet. First, position the decal where you want it to appear, and gently slide the film off the paper and onto the model. It’s a good idea to "anchor" a tip of the decal film to the model before sliding it all off. Otherwise, the decal may fold up on itself, which may ruin it. Press the decal against the model as you slide the rest of the backing paper out from under it.

With your fingertip or Q-tip, dab the decal and surrounding area of the model with water.
Now you can slide the decal on the model until you get it in the exact position you want. Do this as gently as possible. You will tear the decal if you use too much force.

When the decal is positioned just right, use your  Q-tip to press out gently any air
bubbles trapped between the model and the decal. Start from the center of the decal
and press outward. Soak up any excess water with a paper towel, facial tissue
or Q-tip, but be careful that you don’t leave behind any paper lint. PICTURE 3

The decal will dry in 10 to 15 minutes, so you shouldn’t touch it before then. If you are careful, you can apply additional decals to your model while the first decal is drying. Just be sure that you don’t touch the ones you have already applied.

Sam Browne Belts       Honor Guard Flag Carriers        Sam Browne Belts

The Anatomy of a Decal

The decal itself is printed on a special film which is secured to a sheet of paper backing. When you apply decals, you use water to loosen the film from the paper sheet. Then you press the wet film against the surface of the model.

The adhesives applied during manufacture to the bottom of the film literally glue the decal to the model. Since the adhesive is already on the decal, you don’t have to use cement or glue. The adhesive also takes a few minutes to set so you can slide the decal on the model to position it just the way you want it.

Finishing the Model: Decals

You can apply decals to the bare plastic surfaces of the model or over parts that you have painted. Unless you have painted your model with flat paint (as opposed to a gloss or semi-gloss paint), the process of applying the decal is the same for painted and unpainted models. You can expect good results if you take your time. In the text below, you’ll learn the basics of applying decals. See the "Model Building Using Cement," section if you have painted your model with a flat paint. In later sections, you’ll learn how the pros do it and how to make your decals look better.

Cleaning Up

When you’re done painting, take a few moments to clean up and recap the bottles of paint. Be sure the caps are on tight or the paint will dry out. A tip: Storing the closed bottles upside down will reduce the loss of solvent when bottles are kept for long periods of time. Clean the brush using the paint thinner/brush cleaner. To do this, pour a little bit of the fluid into a shallow pan or old dish (don’t use a good dish), and dip the brush in it. Periodically remove the brush and wipe it clean with a paper towel. When it looks as if all the paint has been removed from the brush, dry the bristles and store it upright in a jar or glass. Avoid storing the brush lying down, and never stand a brush up so that it rests on its bristles.

Letting the Paint Dry

Model paint sets up in less than one hour. That makes the paint dry to the touch (meaning that it won’t leave wet paint on your fingers), but the paint still won’t be completely dry. It takes from 6 to 12 hours for model paint to dry all the way. The drying time varies, depending on the humidity and temperature. Until you gain experience in painting models, you are better off waiting the full 12 hours - overnight before handling your model. If you don’t wait, you could ruin the paint job, and fixing it is really tough. Patience really pays off at this point.

During the initial one-hour setting time, the paint is still wet and tacky, and any dust that’s in the air can settle and stick to the model. For the first hour or so, it’s very important that the model be kept in a dust-free place. If you’re working out in the garage, take your painted model inside where it is less dusty. Carry the model on a piece of cardboard; don’t transport it with your hands.

Applying Paint

Hold the brush like a pencil and dip the tips of the bristles into the paint. Don’t dip the brush up to the metal collar. Over time, paint on the inside of the collar will ruin the brush. Through something called capillary action, paint dabbed to just the tip of the brush will be evenly distributed to the full length of all the bristles. Don’t fight nature; let it work for you.

Brush the paint onto the model using straight, even strokes. Brush on the paint in one direction only. Don’t go back and forth or side to side. Painting in one direction minimized brush marks.

You’ve probably heard this suggestion before, but it’s an important point to remember. It’s better to paint your model with several thin coats than with one heavy coat. If one coat of paint doesn’t cover the model well, let it dry completely (overnight), and brush on a second coat.

revellpainting.gif (29329 bytes)   revellpainting2.gif (17657 bytes)  revellpainting3.gif (27911 bytes)

revellhull.gif (19012 bytes)               revellhull2.gif (20047 bytes)

Handling Paint

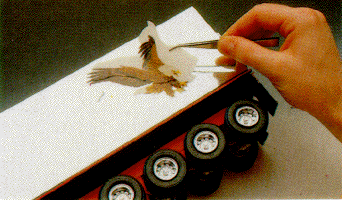
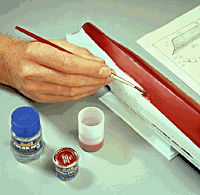
Model paint comes in small glass bottles. The bottles are practically unbreakable, but don’t test them by smashing them on the ground! Be careful when handling and storing your paints, and they will last a long time. Always keep the jars in a box, such as an empty show box or hobby center, and you won’t have to worry about paint from a broken jar smearing the carpet. Most model paint is permanent. Once it is dry, it cannot be easily removed from most model surfaces without special solvents.

Open the bottle with your fingers or a jar cap opener. Once the bottle is open, set it in the shoe box, hobby center, or other container. Use a round toothpick to stir the paint gently. Make sure the toothpick goes all the way to the bottom of the bottle while you stir.

Why is stirring necessary? Over time, even the finest model paints separate, and stirring helps mix the ingredients again. Without stirring, the heavier part of the paint--the pigment (or color)--will be at the bottom, and the paint at the top will be runny and thin.

Stir for about a minute and remove the toothpick. Scrape the toothpick against the inside rim of the jar to remove the excess paint. Use a new toothpick for each color.

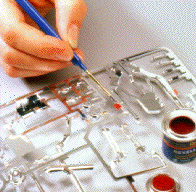
The following describes some potential paint problems and always to avoid them:

Thickened Paint.

The most common cause of thickened bottled paint is evaporation of the enamel solvents or water. The evaporation of the liquid is usually due to painting directly from the bottle and while the paint is in storage. When brush painting an extended time, pour out into a separate container the amount of paint required. Wipe away excess paint from around the bottle rim prior to cap placement. Invert bottle during storage. These two suggestions will reduce the evaporation process, increasing the paint's longevity. Paint will also thicken or gel when the wrong thinner is used. A word of caution: not all thinners are created equal. Use the recommended thinner for the product for the best results.

Although manufacturers recommend thinning ratios between paint and thinner, the recommendations are starting points. Depending on the airbrush unit, power source and environmental conditions, the ratios may vary. Recommendations, for example, for the Pactra RC Racing Paints is 9 parts paint to 1 part RC thinner.

Thin Paint.

When experiencing watery, thin, low coverage bottled paint, the most common factor associated with this is the insufficient mixing of the pigment and liquid. Merely shaking the bottles will not provide the right viscosity of the paint to achieve coverage. A stick or brush handle should be inserted into the paint and stirred until the pigment is not longer settled on the bottom or sides of the bottle. This procedure should also be followed when mixing paints before pouring into a cup and thinned for airbrushing. When low coverage is experienced using aerosol paints, the two most common causes are that the substrate needs to be color neutralized or a transparent color is being used. All Testor Candy colors are transparent paints. If experiencing low coverage when airbrushing, usually too much thinner has been added.

Orange Peel.

Orange peel is easy to spot. The finish resembles of the peel of an orange. It is caused by the rapid evaporation of the solvents either while the paint is drying, or when the paint is being applied. It becomes more pronounced at higher temperatures and/or when lower humidity conditions exist. Orange peel can also happen if the aerosol paint can or airbrush is held too far away from the object being painted under conditions, when using too much thinner in an airbrush or allowing the model to dry in a spray booth with the exhaust fan on. It is usually only visible on gloss finishes. Once orange peel develops, it is necessary to remove the film and start over. Orange peel can be experienced when applying enamels, polyurethane's, and vinyl acrylic lacquers.

Self-Lifting/Wrinkling.

"Self-lifting" is a common occurrence associated with gloss finishes. The finish will resemble a spider web or cracked mirror appearance. Self-lifting occurs when an application of paint is applied between 3 and 48 hours after the last application. To eliminate this problem, only apply subsequent coats of enamel before three hours or after 48 of the last application. Self lifting can occur when applying enamel and polyurethanes.

Fish Eye.

"Fish Eye" is the formation of depressions or craters on the film with a black dot in the middle of the bubble. This reaction occurs when there is contamination of the product, equipment or environment. This can be extremely difficult to isolate and eliminate the cause. Fish eye can occur on flat and gloss finishes with any product formulas.

Bubbling.

Bubbling is the formation of many small bubbles in dried enamel film This can cause a gloss finish to have a dull, rough appearance. This reaction is not uncommon when applying gloss enamel solvent-based spray paints when humidity is excessively high. To reduce the chance of bubbling, spray only when relative humidity conditions are 60% or lower.

Hazing/Blushing.

Hazing, associated with lacquers, appears as a cloudiness in the dried clear or pigmented film. This reaction is commonly found with lacquers when relative humidity conditions are high, trapping moisture in the dried film.

If hazing is experienced with Aero Gloss, once the humidity level has decreased, a compatible lacquer thinner should be applied in a fine mist to the dried film. The thinner dissolves the top layer of the lacquer film and allows the moisture to evaporate. This will eliminate the hazy appearance. The application of too much thinner will result in ruining the finish.

When hazing is experienced with Glosscote lacquer, apply mist applications of the Glosscote when the humidity level decreases. The lacquer will dissolve the initial layer of lacquer and allow the moisture to escape.

Runs, Sags, Drips.

Runs, sags, and drips are usually caused by the application of too much paint or improper mixture of the paint. To avoid this, apply several light applications to build up coverage, making sure that the bottled paint has been stirred or aerosol has been shaken. Also, when applying a transparent paint, use gold, silver or copper primer as an under coat. When a primer is not applied first, usually too much paint is applied in an attempt to achieve opaque coverage ultimately causing runs, sags and drips.

Film Drying.

When paint is not drying on the surface, the most common cause is use of the wrong paint. When painting flexible vinyl or rubber, Testors solvent based enamel will not dry. A water based acrylic paint should be used. Dry time on Model Master acrylics, Pactra acrylic and enamels is between 30 minutes to 1 hour. Lacquers dry even faster. However, the environment and thickness of coats will have an impact on the amount of time it takes for the films to thoroughly dry.

Diminished Adhesion.

It is important to wash your model with mild dishwashing detergent to remove model release residue from the model. If any oily substance is on the model, the finish may appear blotchy and have diminished adhesion. Adhesion will also be compromised if acrylics are over thinned.

Honor Guard Flag Carriers

Melted/Etched Plastic.

Polystyrene plastic will distort and even melt if exposed to heat, and it will develop an etched surface appearance if certain solvents contact it. Cement should be applied sparingly to avoid melting parts, diminished adhesion and the loss of the cement's bonding or welding characteristic. When removing paint from polystyrene, never saturate the surface with thinner. Refer to "Film Removal."

Incompatible Reactions.

Adverse reactions are manifested by either environmental or chemical incompatibilities between solvents and substrates. When mixing or applying products in their wet or dry state that are not recommended by the manufacturer, it is advantageous to rest on the side compatibility.

If experiencing enamel that isn't drying, the substrate is probably flexible vinyl or a combination of flexible vinyl/polystyrene. Solvent based paint will never dry on vinyl. There are not solvents or procedures that will force the enamel to dry. The only means of reversing this adverse reaction is to remove the enamel film and start over.

Finishing the Model - Paint

Your model may be molded with colored plastic, and you can leave the kit as is with its original color scheme. There is nothing wrong with that, especially if this your first kit. Your model looks great as it is..

But if you want it to look even better, you can paint parts of the model. As you progress in you model-making skills, you will paint some of the parts before you assemble the kit. For the Snaps-Together model example, you paint the model after assembling the kit.

There are two types of model paints: those that come in small bottles and those that come in spray cans. Spray paint is used to cover large areas; it is usually used to paint parts before the kit is assembled or to paint subassemblies - complete sections of the model. Bottle paints are applied with a small brush, so they allow for more detail. We’ll discuss only bottle paints in this chapter; spray painting is covered in the section "Painting Your Model."

Paints usually are not included in the model kit, so they must be purchased separately. Most of the better kits provide a list of suggested paint colors on the box of the model. You can save yourself some time by purchasing the paints when you buy the model. Refer to the list of the colors or look at the picture on the box.

If you are just starting, you may want to get a plastic model finishing center or paint kit. These come with a variety of popular paint colors. You will save some money by purchasing the paints as a set. You can always supplement the kit with a few additional bottles of paint in your favorite colors.

Assembling the Kit

Now comes the fun part! Assemble the model as explained in the instructions. To put two pieces together, align the stems in the first piece with the holes in the other. Press the pieces together firmly but gently. Don’t apply too much pressure or one of the pieces may break.

Sam Browne Belts       Honor Guard Flag Carriers

Don’t jump ahead in the instructions. If you skip around, you may build the model in the wrong way, and other parts may not fit. Take your time and double check your work now and then to make sure you are building the model properly. If a piece won’t stay snapped on, you may have to cement it into place. See the next chapter on how to use model cement.

When the last part has been snapped into place, your model is done. Pat yourself on the back for a job well done.

Starting the Kit

When you feel you are familiar with the kit, lay the runners and instruction sheet on a table. You may want to place a sheet or piece of old cardboard on the table, so you don’t accidentally scratch the surface. Make sure you have enough light to read the instructions and put the model together. Some of the parts will be small, and if there is not enough light, you could make mistakes.

Following the exact steps in the instruction sheet, carefully remove the first parts from the runner. Do not remove any more pieces than necessary. If the instructions don’t say you need a particular part for this step, don’t take if off the runner yet.

With the runner in one hand, grasp the piece you want to take off with the other. Bend the piece back and forth until it snaps off. You should know that this isn’t the best way to remove parts from the runner, but it’s the easiest and you don’t need tools. In the next chapter, you’ll learn a better way to remove the parts from the runner using a hobby knife or saw.

More than likely, there will be a small amount of extra plastic on the part. This plastic can be where the part was connected to the runner, or it can be caused by plastic that oozed out from the mold when the kit was made. This is commonly called "flash."

Do not confuse flash or leftover runner plastic with the "locating pins" that are modeled into the joining edges of the pieces. The stems or pins are meant to go into matching holes on another part. If you cut off or file the stems, your model may not fit together correctly. You especially need the stems in a Snaps-Together kit, or the pieces won’t stay together!

Use the emery board to file away the flash. Go slowly and inspect your work every few strokes of the board. You can use the fingernail clippers to remove the nub of plastic left over from the connection to the runner. Carefully nibble the leftover plastic with the clipper a little bit at a time. The last speck of plastic can be smoothed away with the emery board.

While cutting or sanding, hold the part gently. If you apply too much pressure while holding the part, you may break it (a broken part can often be cemented back together, but it’s easier to avoid breakage in the first place). If the part is too small to hold while cutting or sanding, place it on the table and work with it there. Avoid overhandling small parts. They are the easiest to break.

revellsanding.gif (18971 bytes)         revelltrim.gif (51370 bytes)

Read the Instructions First

Every model kit comes with an instruction sheet. Some instruction sheets are more complex than others, but they all tell you the basic assembly procedures required to build the model piece by piece. Before actually building your model, however, carefully read the instruction sheet at least once. While you are reading, examine the parts of the model to familiarize yourself with the kit.

Take the runners of the plastic parts out of their protective bags, but do not remove the individual pierces. Some kit makers mark the part numbers on or near the parts. If you look closely, you’ll see that near each part on the runner is a tab, and written on the tab is a number. This number corresponds to a part number on the instruction sheet and helps you identify the piece. If you break all the parts off now, it will make it harder to tell them apart later.

What You’ll Need

You don’t really need anything other than your hands to build a Snaps-Together model. But if you want a better-than-average model when you’re done, scout around the house and find two common manicuring tools: an emery board and a fingernail clipper.

If you want to paint the model, you’ll need a couple of jars of paint, a medium-sized paint brush (such as a number 2), and a bottle of paint thinner/brush cleaner. You also will need a small disposable aluminum baking tin or an old dish for the thinner/cleaner. If you would like to apply decals to the model, you will need a pair of scissors to cut the decals you want from the sheet. Keep a few paper towels or facial tissues handy to wipe up spills and dry off parts.

Your First Model

Model building is a fascinating hobby. However, the quality of the finished product will depend on your technique and the skill level and tools you use. The following offers some valuable tips and techniques for the best modeling results possible, including a guide to the optimum finishing products and tools that will help you achieve the various levels of expertise. As with any new learning experience, there is an entry level on which skill is built. A word to the wise: remain positive, patient and persistent so that you achieve and enjoy the satisfaction of assembling and completing a model you'll be proud to display.

The following describes three levels of modeling expertise, along with tools required to optimize results at each level:

Entry Level (occasional model builder) -- precision cement, hobby knife, paint set, brushes.

Entry Level (striving to enhance skills) -- precision cement, single action airbrush, propane, compressor (optional), tweezers, putty, sanding films, sprue cutter (optional), hobby knife, Model Master brushes, airbrush thinner, brush cleaner/thinner.

Advanced Level (has achieved excellence) -- professional double action airbrush and accessories, compressor with regulator and moisture trap, all above-mentioned supplies, Dullcote, Glosscote, Lacquer thinner, Model Master paints, Model Master brushes.

There are many kinds of models available, from simple no-cement-needed kits to advanced models with hundreds of pieces. Some kits are harder to put together than others, so if you’re just starting out in model building, your first project shouldn’t be too difficult. A good model kit to start with is a snap-together car or truck. There is no cementing involved, and you don’t even have to paint your model if you don’t want to.

In this section how you'll learn the basic steps of building a snap-together car. For those of you who are interested, we will also show how to apply decals to the finished model and how to paint your model to obtain an even more professional look.


Copyright 2011 The Testor Corporation, All Rights Reserved

Pictures from Revell Germany Katalog

Back to catalogue